
It’s been a few months since my last dev log entry but I’ve been quietly learning some new software and making some exciting progress on Nixie. I find myself often getting caught up on the creative side of things such as art, characters, story, and music, but as 2022 began, I made a resolution to focus on actually “making the game.”
One of the major, super important, really-really necessary elements of any 2D platformer is… levels. I had put very little thought and effort into actually making any levels and realized before I can really get into the nitty gritty of calibrating game mechanics and player movement, it’s kind of essential that I have a process for creating the game’s map.

I spent about a solid week literally just looking at old game maps on vgmaps.com. What an incredibly cool website! There are tons of retro game maps all with pixel perfect rips of the artwork and layout of the levels. I started to develop an understanding of how these maps were created – with repeating tile sets.
Switching to Aseprite for Pixel Art
Up until now I had been doing all of the game’s artwork in Photoshop. However, Photoshop isn’t made specifically for pixel art and although you certainly achieve anything with it with enough time and effort, I made the switch over to Aseprite because of one very compelling feature. Aseprite 1.3 introduced a tool set specifically for creating tile sets and to make a long story short – it’s incredible. The ability to create seamless tiles that can be used to create a variety of dynamic platform shapes and interesting environment decorations is implemented perfectly in Aseprite in my opinion.
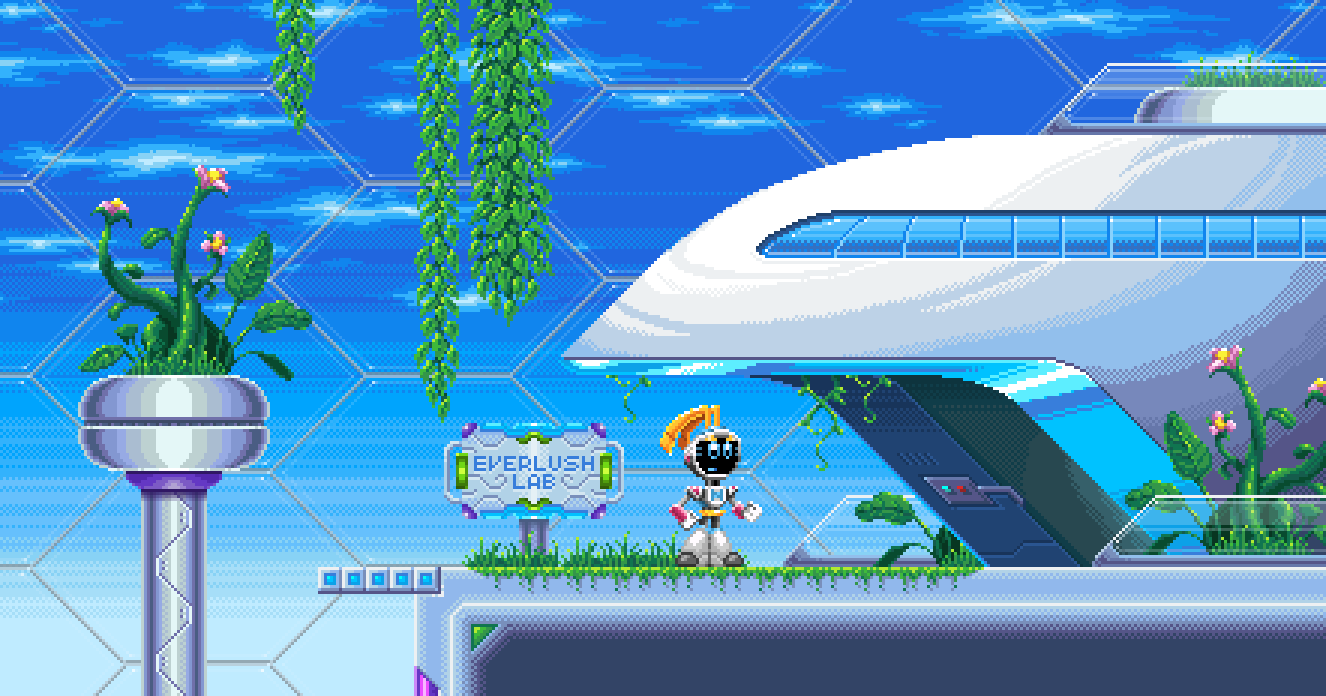
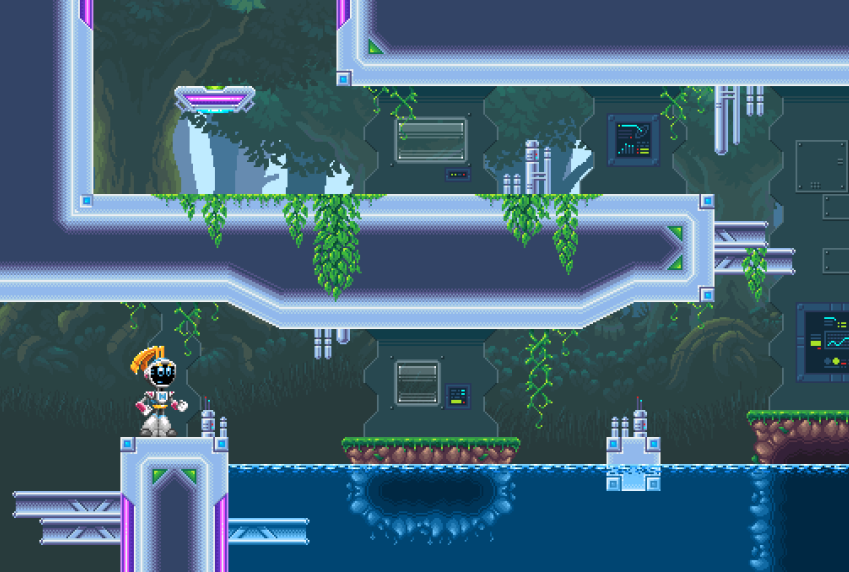
One of the first areas Nixie will explore is called the Everlush Biodome. This area will be a hybrid between nature/plant life and technology/laboratory elements. I decided to challenge myself to create a biodome world with Aseprite tile sets without ever having created a tile set before. I started with the giant hexagonal windows and then focused on the main “lab walls”. From there I just kept adding decorations, different platform types, and other elements. I used a lot of references from other games, especially the Megaman X series and 2D Sonic games.
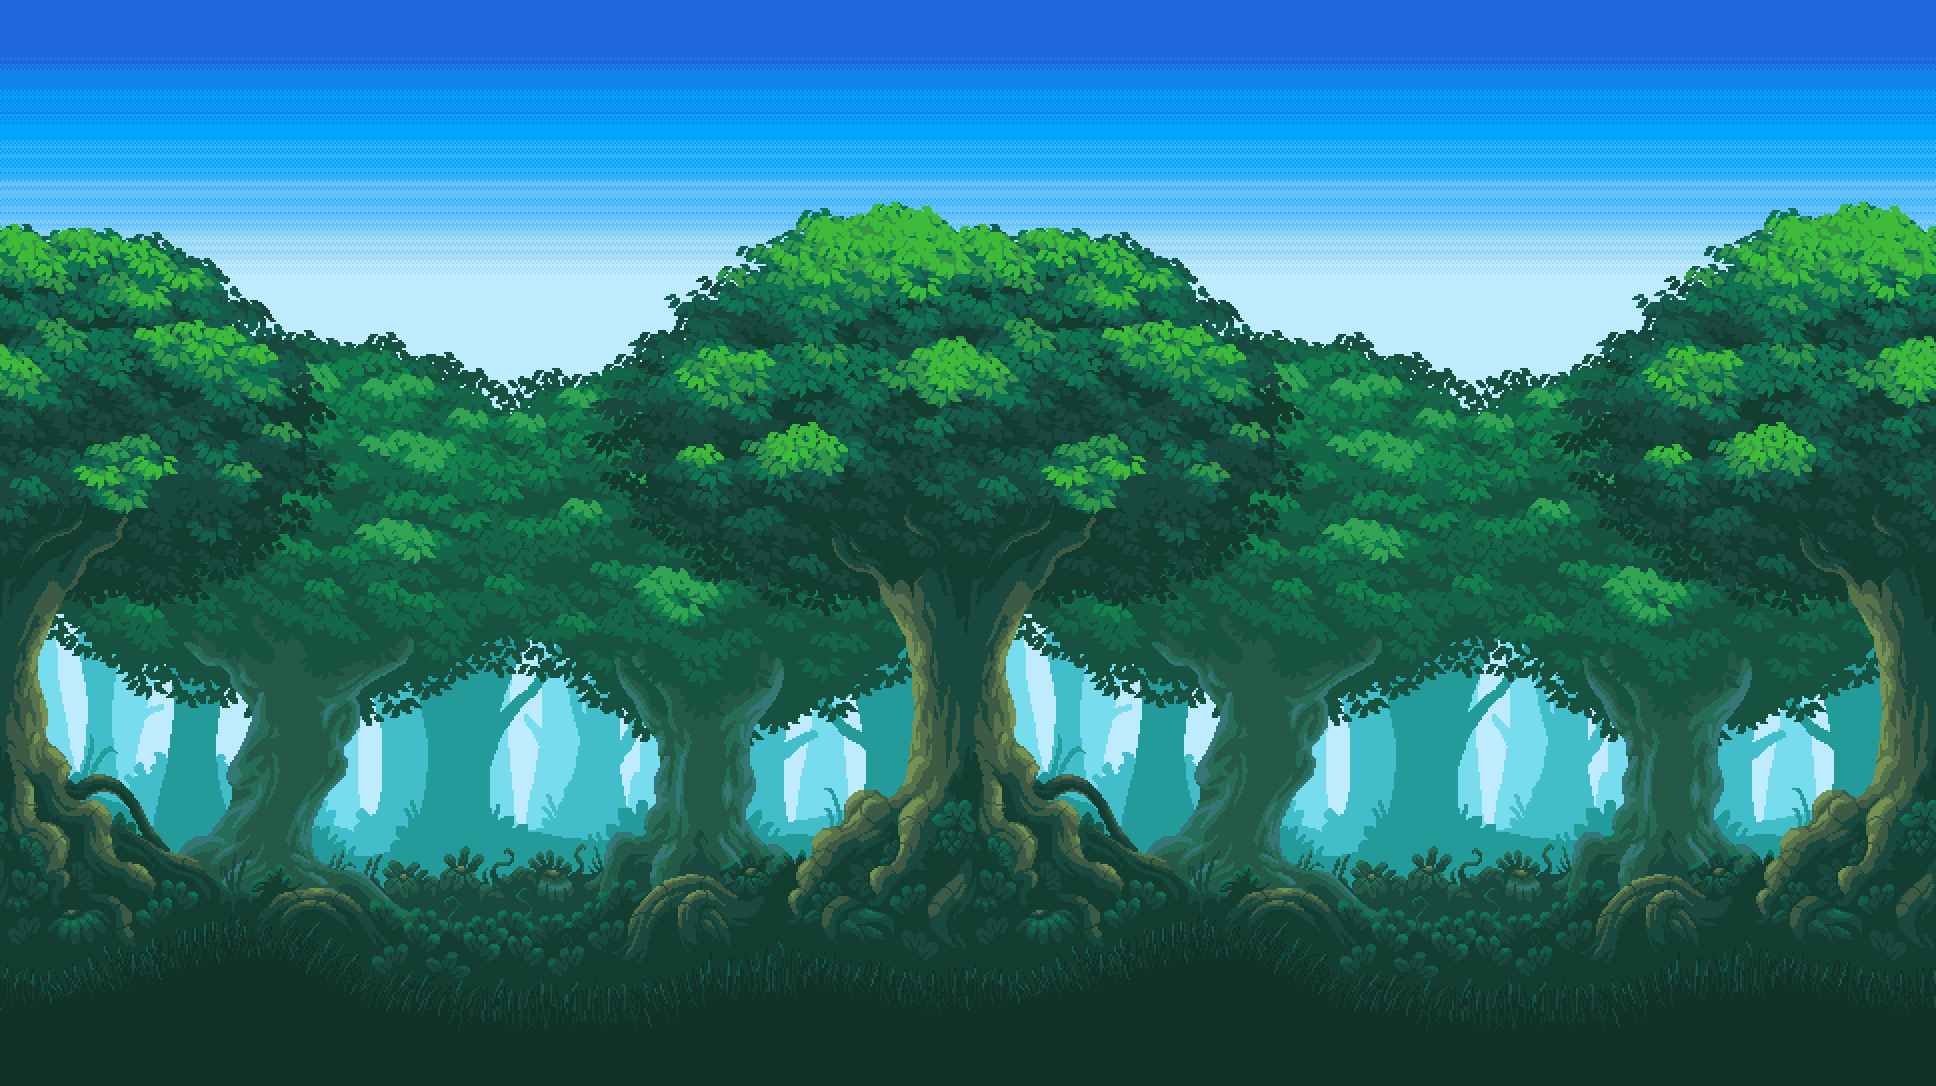
Finally I needed a repeating background to really fill up all of the empty space in the lower sky. I painted my most ambitious piece of pixel art yet! This was inspired heavily by various modern pixel art indie games like Eagle Island and Beard Blade, both of which have beautiful 16-bit artwork. I created some “leaf” brushes using Aseprite’s brush tools to make painting the leaves a lot less time consuming. Most importantly though – it repeats seamlessly, meaning I could fill up large areas of the background with this art.

Using Aseprite to create tile sets is great, but it’s only a small part of the equation. Aseprite is an art program, not a level designer. A major obstacle I was coming up against is that although Unity supports tile sets, it does not really have a good way of displaying the entire game map all at once. Each “room” is saved as a “scene” in Unity, but to have all of the scenes open at one time is impossible, meaning you can’t see the entire world map as you are designing levels.
Enter LDTK
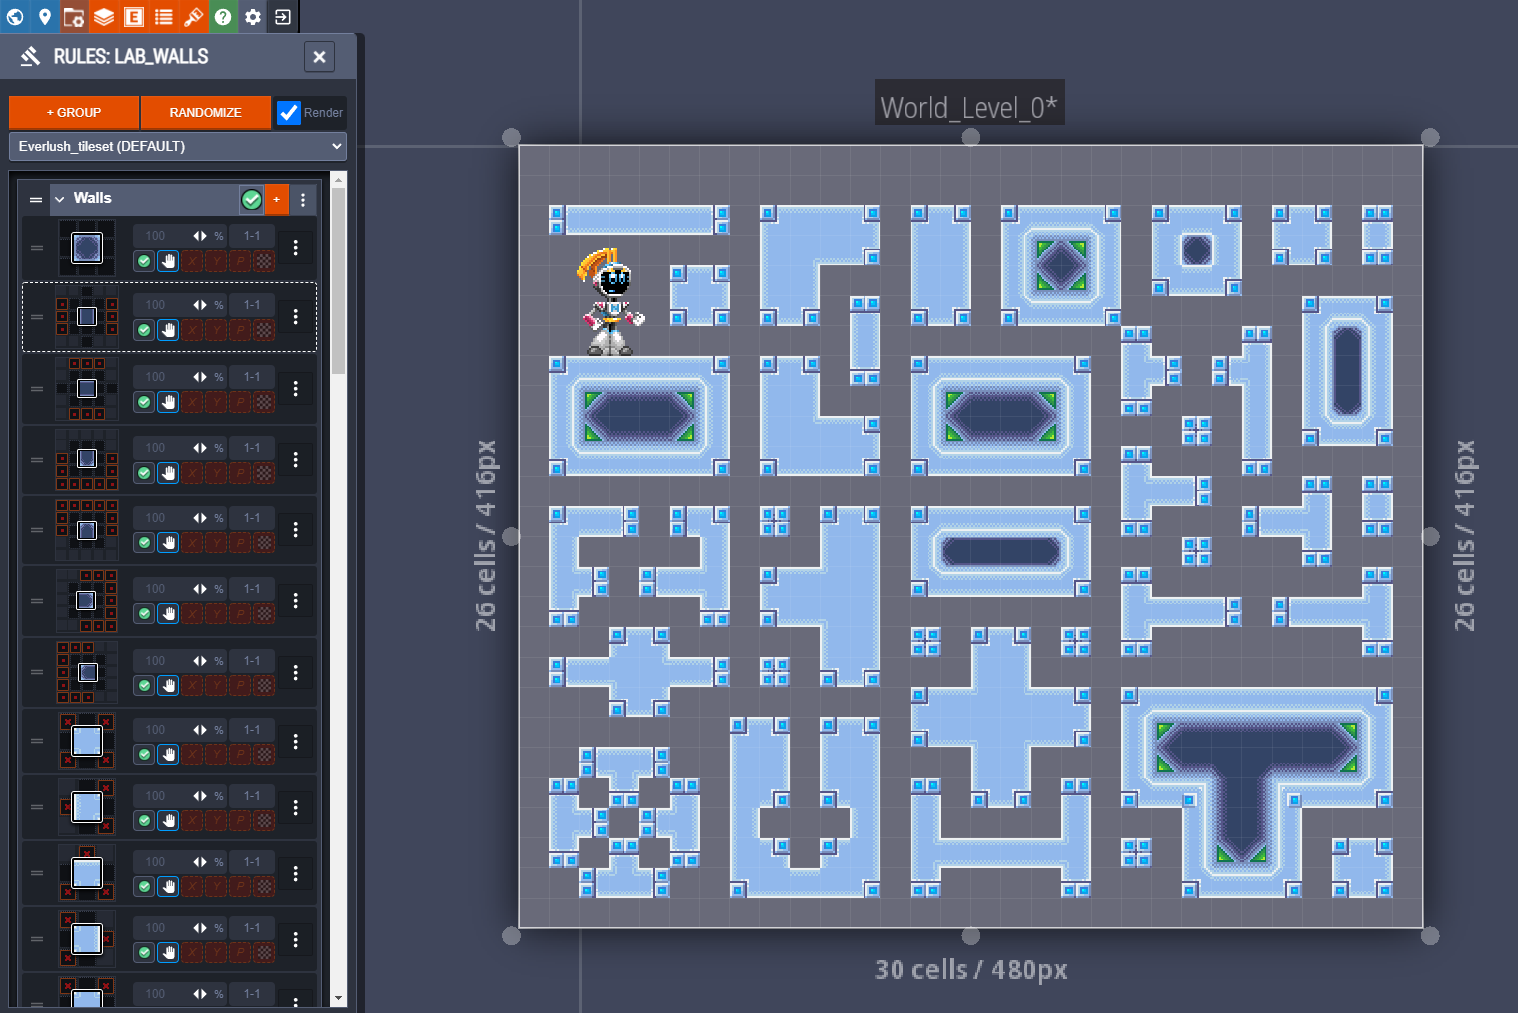
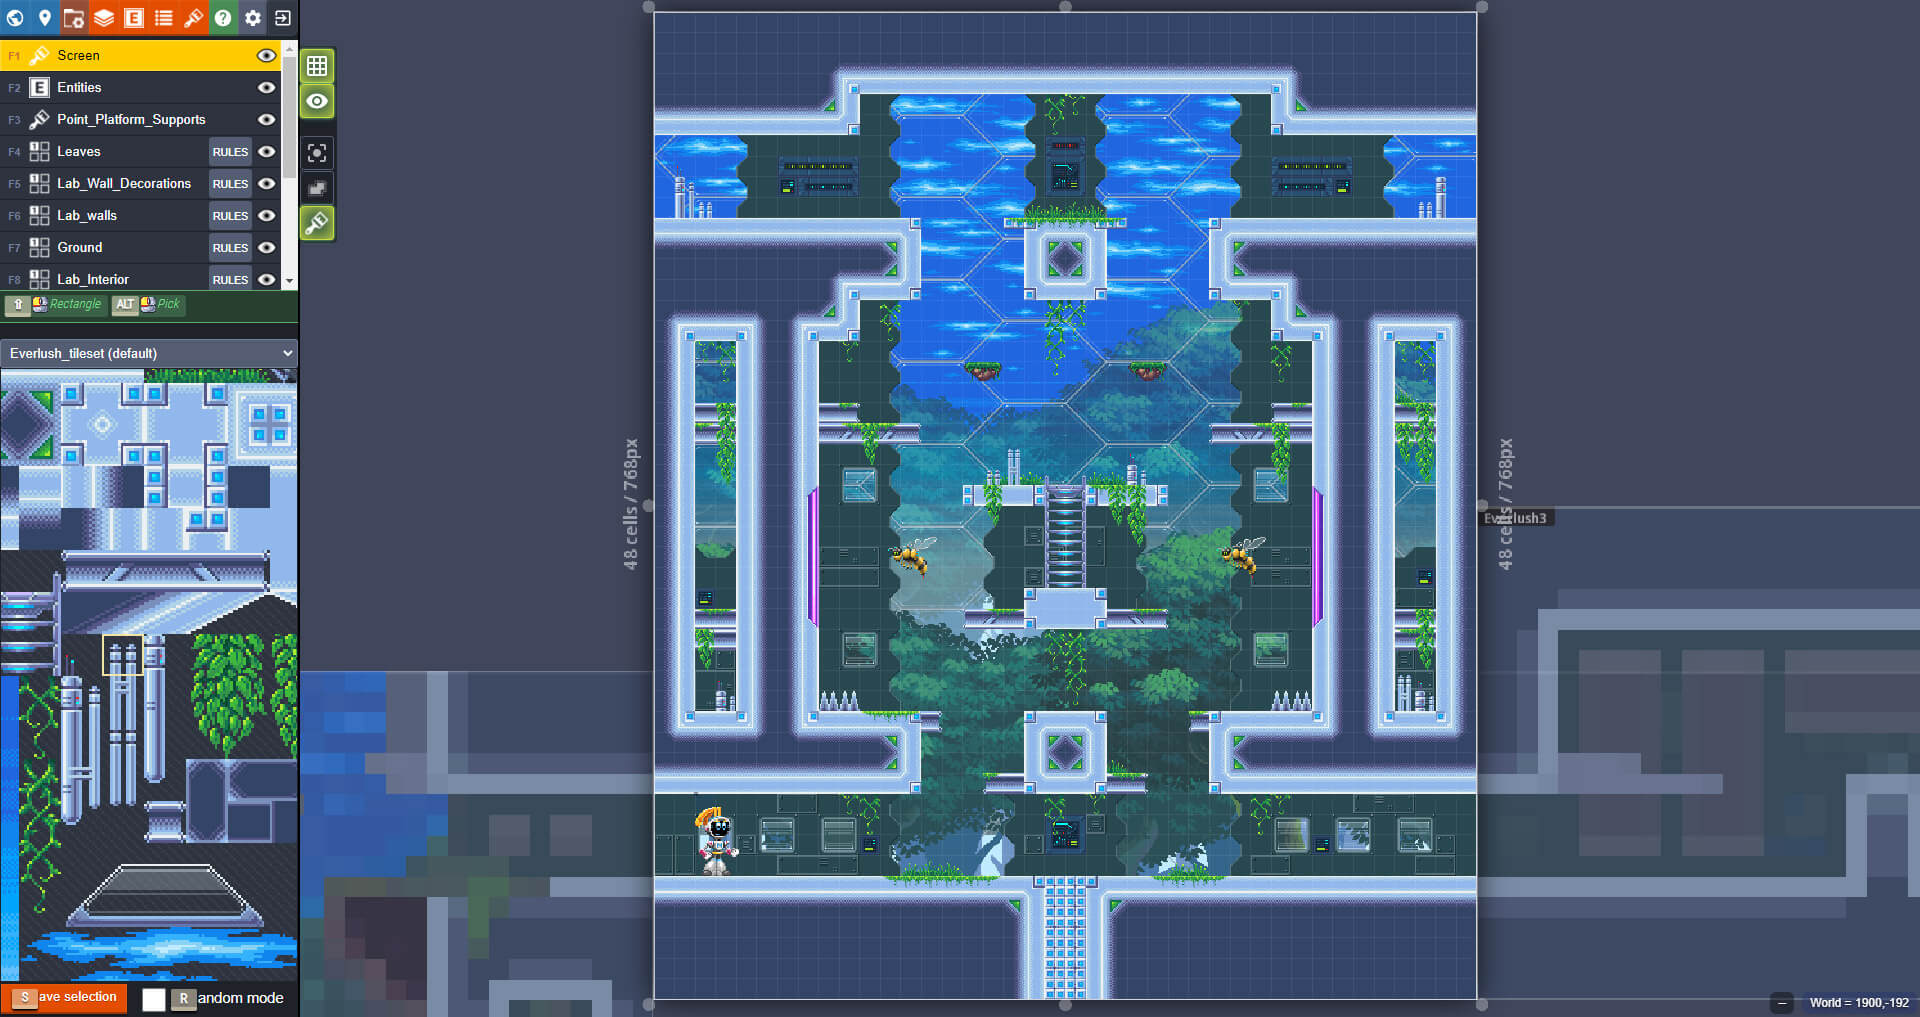
LDTK is a really awesome, modern app for designing 2D levels based on tile sets. In addition, it allows you to assign rules for your tile sets so they automatically paint the correct tiles based on the shape of the walls and platforms you draw. Honestly, I could not have found this app at a better time as it solves the exact problem I encountered with trying to design levels directly in Unity – it allows me to see the entire world map and navigate seamlessly across different rooms to ensure everything aligns properly.

So the new challenge becomes “porting” over the artwork from Aseprite into LDTK and creating the rulesets that make it easy to quickly paint level designs + environment decorations. Once the tile set is imported into LDTK and the autotiling rules are setup, creating the walls of the level becomes very easy, fun, and satisfying!
Pushing LDTK further, I created various layers for all of the background and foreground decorations. I also figured out a workflow between Aseprite and LDTK that would allow me to continue to expand the tile set and add more art if I so desire. The results have me pretty excited so far!


Next Steps
The next step will be to take the levels from LDTK and import them into Unity, and of course… there’s an app for that too. After that I can start to fine tune Nixie’s movement abilities and calibrate the levels based on that. I imagine there will be a bit of back and forth between programs to get things where they feel good. That may be a good idea to get some initial player feedback – even for simple things like whether or not the jump feels right. These little adjustments can have a major affect on the design of the levels so it’s important to nail it down before I spend hours and hours in LDTK designing a map!
If you found this post informative and/or interesting, please consider following me on twitter or joining us in the Nixie Discord for more frequent updates!
